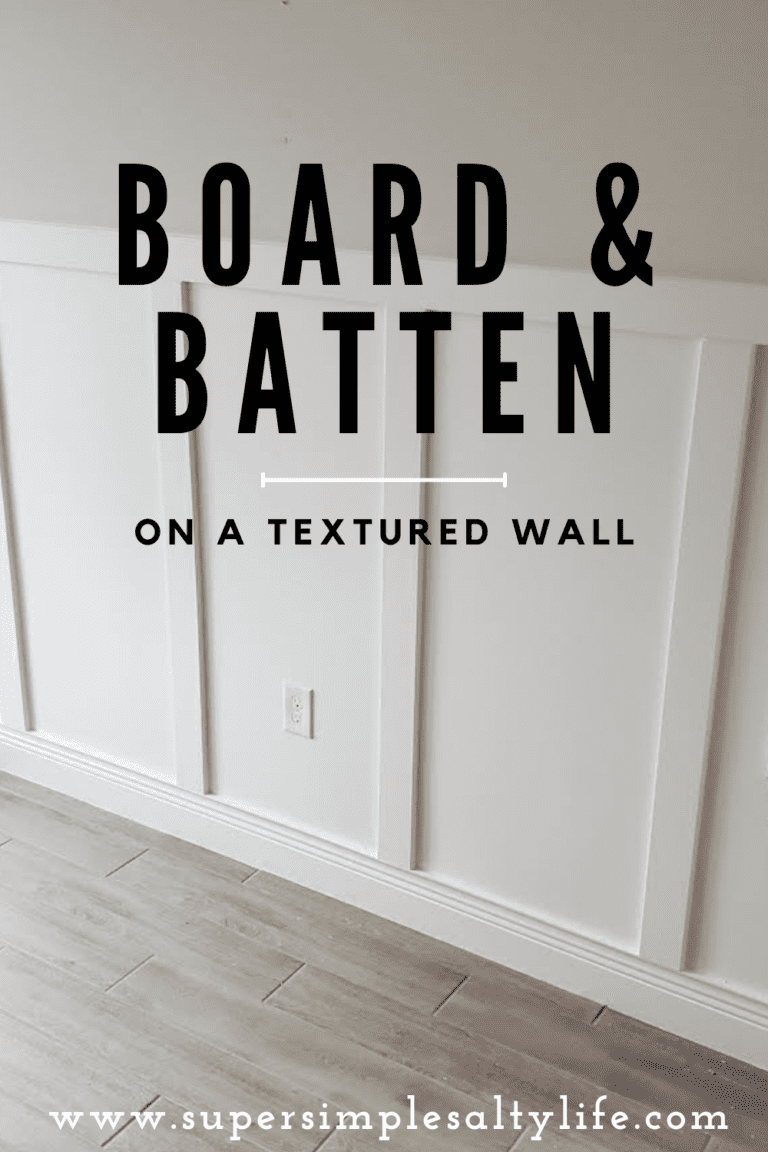
Installing board and batten on a textured wall can be a weekend project!
I love our house, but being new it lacked the character of an older home. Knowing I wanted to add some paneling to the walls to make it more “ours”, I began reading online tutorials but kept hesitating to begin. I think I was overthinking things.
The problem was, most of the tutorials I found did not deal with the issue of adding board and batten to textured walls. Finally I decided to simply start my project and learn along the way through trial and error (hoping for more trial and less error). I’m so glad I just dove right in, because this really is a simple way to improve a builder grade home and make it your own.
I’ll walk you through how I’ve installed board and batten paneling to our heavily textured walls in the main areas of our home. Also, adding an additional ledge on top or painting the molding a rich, darker color can make it even more dramatic with just one extra step. This is an easy DIY project that really adds a ton of character.
I am not a finish carpenter… I have not been professionally trained and I make mistakes! My hope is that this post helps to break down the process so it is easy to understand. I have added board and batten to almost every room in our home, and I’ve finally figured out the most efficient and simple way to make this a quick weekend project that anyone can do! I have to confess: it’s not hard! With the right tools it takes no time to get the panels measured and installed. Here are some of the tools I use most:
This post contains affiliate links. This means I may earn a commission should you choose to make a purchase using my link to Amazon.com. I only recommend items that I personally love!
Should I keep or remove the baseboards?
The main issue with adding board and batten to a textured wall is how to cover up the texture so it looks like it was meant to be there. I have tried sanding down the walls, which just made a huge mess. The best way is to have thin panels cover up the texture in the places you want to add your paneling. However the question becomes: to rip out the current baseboards (huge pain and cost), or use what you already have?
Our house is new so I also couldn’t justify ripping up the baseboards. David would not have been on board with that (haha on board… board and batten…I digress). I found a workaround for the baseboards which has worked perfectly each time. By using a small piece of cove molding installed upside-down above the baseboards, this leaves a small ledge to set the panels on. It also makes a seamless transition using your existing baseboards!
Cove molding installed upside-down creates a seamless transition between your current baseboards and the paneling
Choosing your paneling
Honestly the hardest part is getting the backer boards home from the store, they are 8 foot long floppy panels that are super lightweight but hard to tie down in a truck. Once you know the measurements of your wall and you decide how far apart you want your battens (typically anywhere from 16-24” apart), you could have the hardware store cut your panels to make them smaller for transporting. You want every seam between panels be hidden behind a board. This requires math and can get confusing, I find the easiest way is to draw out your wall on paper and mark where your panels will meet up.
To calculate how many vertical boards you need, take your wall length, divide it by approximately how far apart you want your battens, and add 1. This tells you how many 4” wide panels you will be installing. Keep in mind you will get 2 battens out of each panel if you are doing boards that are 4 feet high. And another tricky thing to factor in, a 1×4″ board is actually only 3.5″ wide. For a longer wall, I use the 1×4’s. If this was in a smaller area, I would go with the 1×3″ boards, which are actually only 2.5″ wide.
For example: In my case, my wall was 170” and I wanted my battens about 24” apart since it is a long wall. 170 divided by 24 = 7, add 1 =8 battens. So I will need four 1×4” 8 feet long MDF panels. The battens will be placed about 24” apart, with one at 96” (or 8’) where the panels will meet up to cover the seam. If you can’t get the battens to line up perfectly with the seam of the 8’ paneling, use a table saw, a circular saw, or have the hardware store trim down your panels to adjust for wherever you want your battens.
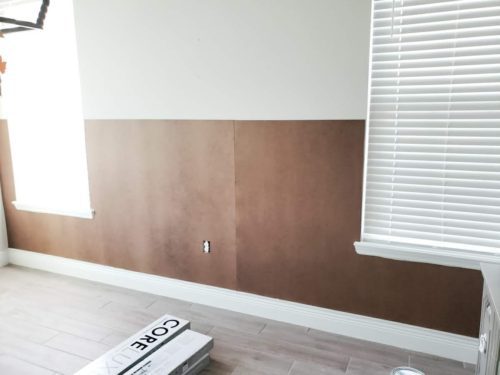
Spacing out the boards to visualize how they will look with my measurements
4' by 8' hardboard boards
Cutting around light switches and plugs
To cut an opening for outlets and light switches, I followed this tutorial from Fabulessly Frugal which makes the process super simple. Basically you make a cardboard template for your outlet, cut it out, and trace the template to the panel that goes in that spot. Use your jigsaw to cut out the hole.
Tip: Make sure to make a new template for each outlet or light switch, I tried using the same one for two outlets next to each other on the same wall and realized my outlets were not evenly spaced from the bottom and I had to start over on that panel! The cuts don’t have to be perfect, your outlet and light switch covers will go over the holes.
Instructions for installing board and batten on textured walls
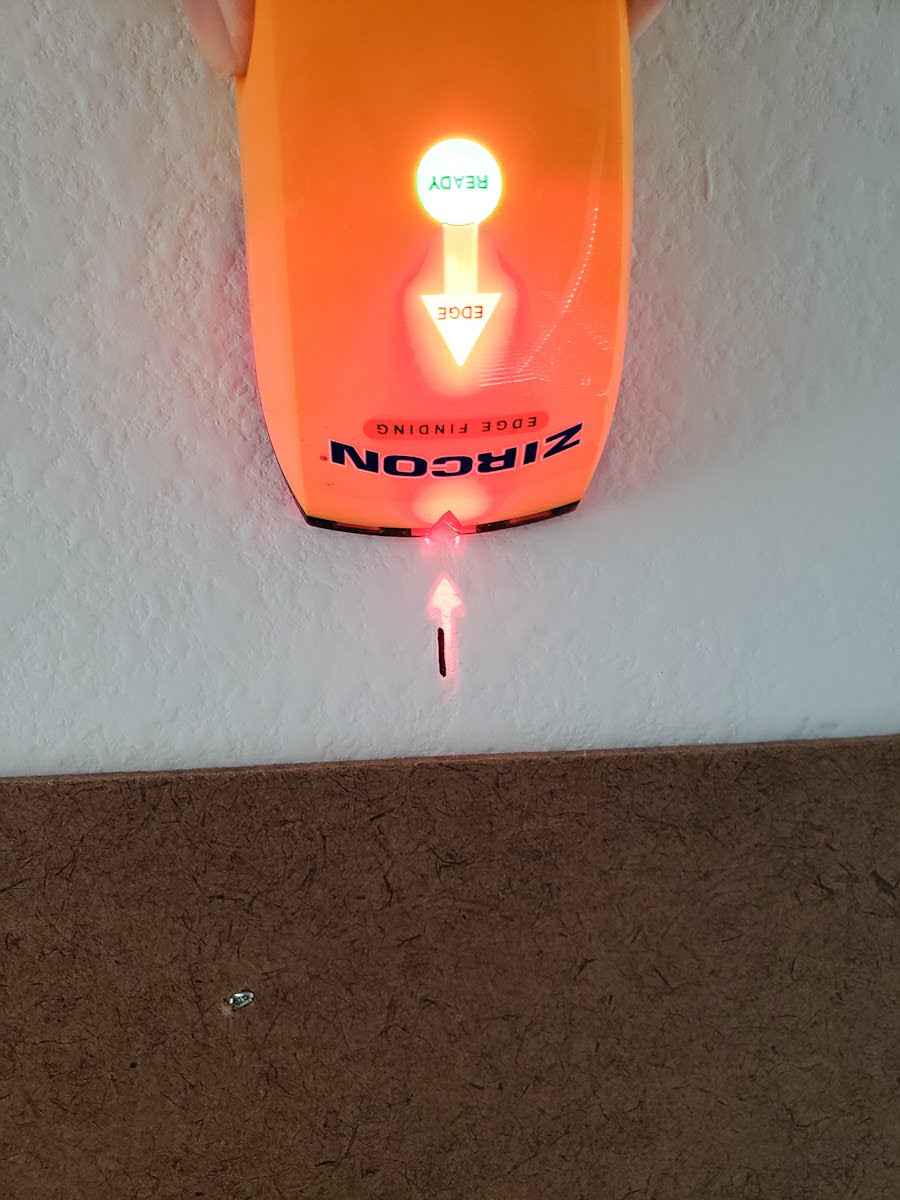
Mark where the studs are along the entire wall using a pencil and your stud finder. (Don’t tell your husband you are using a stud finder, because he will inevitably say “I’m right here”. Every. Time.) You will need to know where to nail in the panels so they are attached to studs and not just the drywall. Place cove molding upside-down directly on top of your existing baseboards and nail into studs using your nail gun. I love my nail gun. It makes me feel so powerful!
Tip: If you’re planning on painting the board and batten a different color than the baseboards, it’s easiest to go ahead and paint the cove molding now to match your baseboards. Fill the nail holes with caulk and then paint with the same paint as your baseboards, usually a semi-gloss white.
Find and mark your studs
Adding the cove molding upside-down creates a shelf for the panels and vertical boards
If you choose to paint your panels a color that is different than your baseboards, paint the cove molding before installing the backer boards
Remove outlet and light switch covers. Make your outlet template using leftover cardboard, and transfer the template to your panels to cut out the outlet holes. Match up the lines you made on your baseboard to the lines from the template on the panels to be sure they line up to the outlets before applying liquid nails. If everything matches up correctly, apply the glue to the back non-smooth side of the panel and attach it to your wall. Nail into the stud lines you marked.
Tip: I suggest painting the panels with a smooth roller before moving ahead. It is easier now than to work around the battens. The utility board is dark so unless you are painting a dark color, you will need several coats to cover it.
Outlet opening was cut using a jigsaw and panels are glued and nailed to the wall
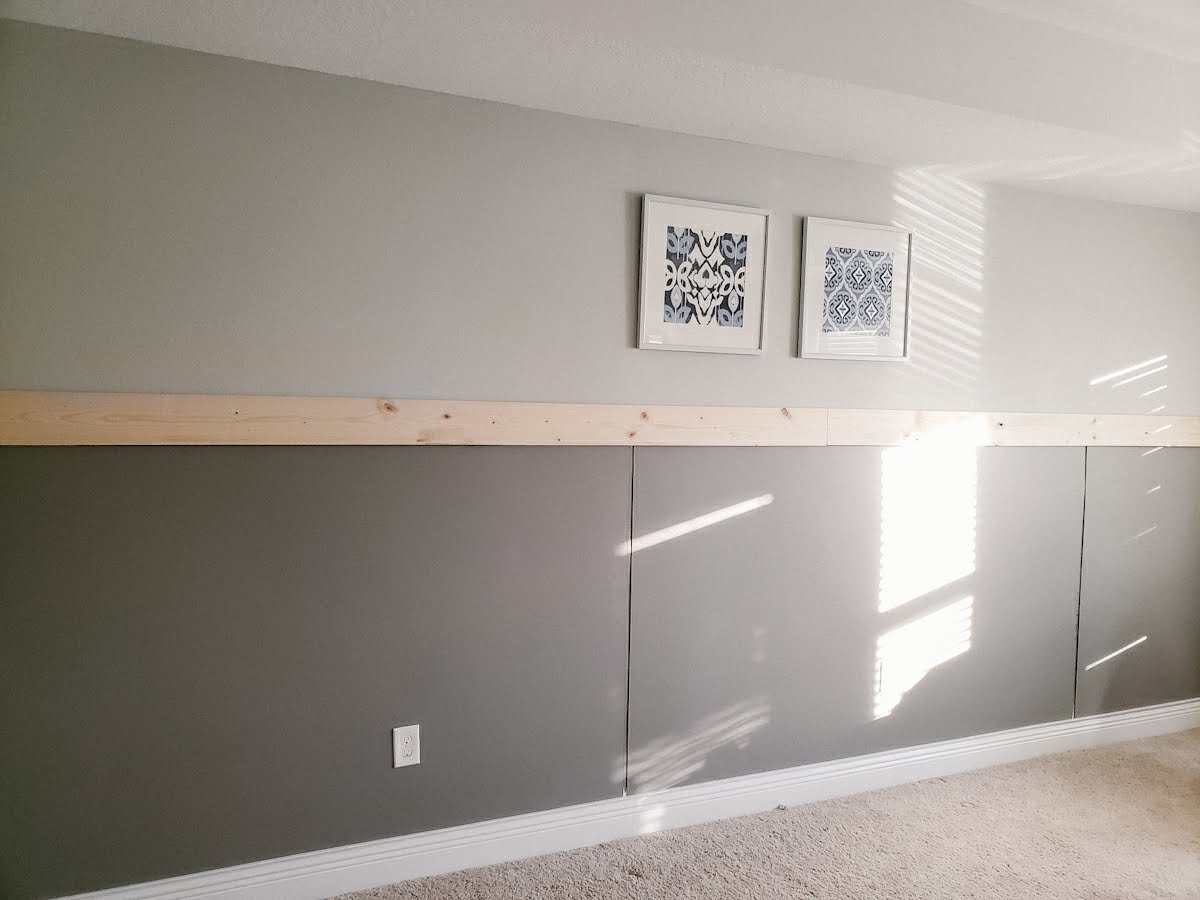
Painting the panels before adding the vertical strips is much easier!
The vertical boards sit on the shelf we created with the cove molding
Measure, cut, and sand the top horizontal boards if needed. I have used 4” MDF here and in the stairwell, and 6” pine boards for my entry way and bedroom (2nd photo). You have free reign here so pick what look you want!
Once all the edges are sanded (not needed if you are using MDF boards), nail them into the studs directly above the installed panels using a level and your nail gun. You will caulk the nail holes and the seams where your boards meet each other later.
For this project in the dining room, I used the 1×4″ MDF board for the horizontal piece. The panels are painted, and I am lining up my vertical boards.
In our bedroom, I painted the molding a shade darker than our walls. I then added a 1×6″ board above the panels instead of a 1×4″ for added character.
Next step is to install the “battens”, or the vertical boards. Mark where each will go based on how far apart you decided to space them. Here I’m doing 24” apart. Technically you should measure the length of each batten as you go and cut to fit. To be more economical, I cut all my 8 foot MDF boards in half and any gaps can be fixed with caulk. Caulk will be your best friend! It smooths out and covers up almost any issue. And you will have issues. Wood is almost never perfect, and walls are rarely straight. And because we are using primed MDF boards here, you really don’t have to sand them. Bonus!
Apply liquid nails to the back of the battens, use your level to be sure they are straight, and nail them in at the places you marked with your nail gun. You’re almost done!
Add a thin layer of liquid nails to each batten
Be sure to level each vertical board before you nail it in place
Slight gaps will be fixed later with caulk
The boards are installed and ready to be painted
If you want to add a decorative 1×2” ledge to the top of your project, measure and cut it now. Nail it into the 1×4” or 1×6” top horizontal board installed on the wall using your nail gun.
Now it is time for caulk. This is when things really start to look finished. Fill in all the nail holes, and caulk around every edge where boards meet. This takes time and patience, so put your headphones on and listen to a great audiobook (or, may I recommend the Hamilton soundrack). Take your time to make sure the finished project looks perfect!
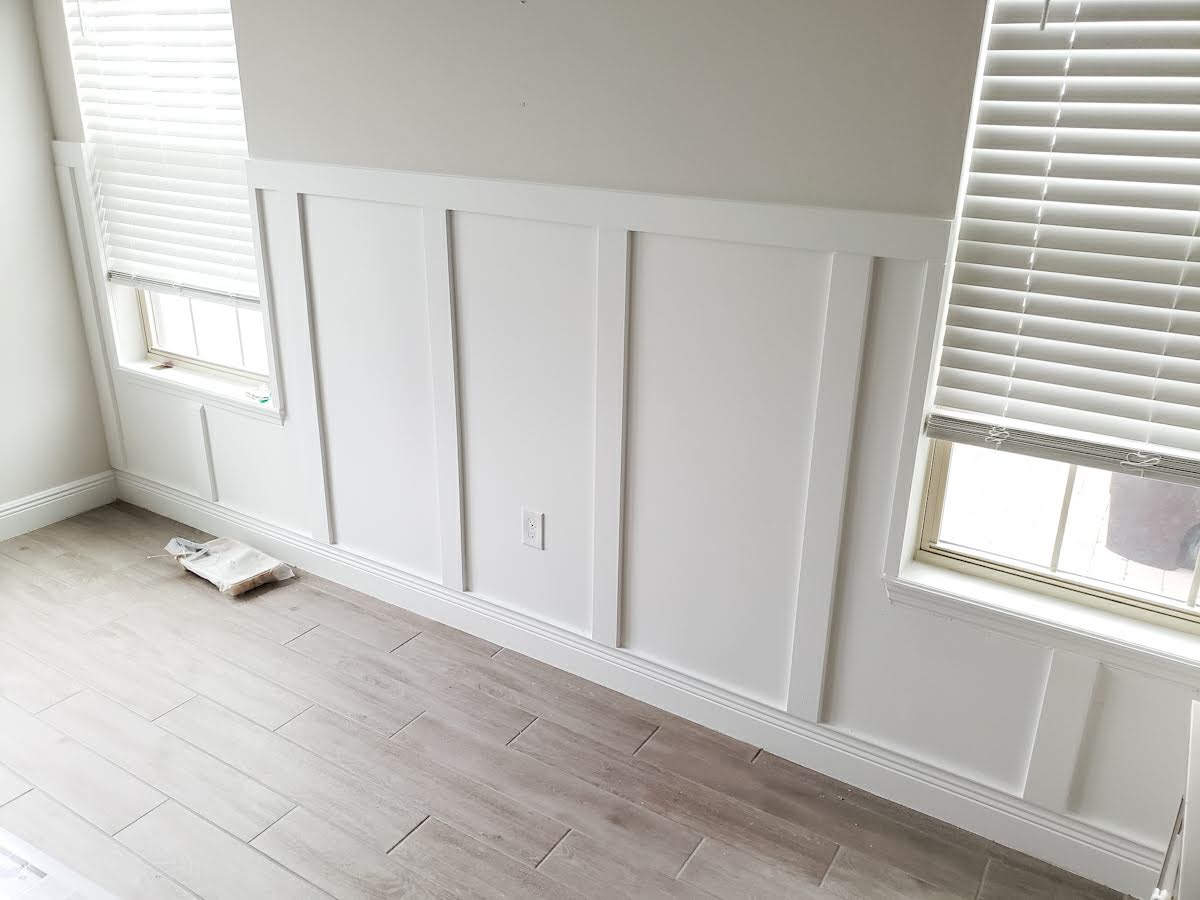
Once the caulk has dried, paint your battens with a smooth roller and get in all the nooks and crannies with the angled brush. Then you’re done! Admire your work, pour a glass of wine, and realize that you just did this and you are amazing!
In the bedroom I added a 1x2" ledge to the top of the molding to make it more of a focal wall
Tape off the top of the molding for clean paint lines and paint away!
Dining Room Board and Batten
Before
After
Before
After
Master Bedroom Board and Batten
Before – No paneling
After – Makes it pop!
Note: Since writing this post, I’ve redone our master bedroom… again! Removed the carpet and painted the molding. I love it even more now!
Follow along for our other “quarantine DIY” projects such as easily adding a faux shiplap wall. You’ve got this!
I came across your article as I have texture walls and am looking to do something like this. I’m new at this and don’t have a stud muffin to help me with “manly” things. I hope you would. I’m still deciding about what to do with my 2 years room. Any ideas? And can I bug you in future with questions? If yes, how? Thank you!
I totally have faith that you can do this on your own! With just basic tools, updating your walls should not be hard. Let me know if you have questions along the way!
Erin,
Thank you for all the valuable information. The wall I will be installing board and batten on has an outside corner and I won’t be taking it around the corner. Any tips on how I can finish it off so that the backer board won’t be seen?
Thank you!
Hi Caileen! You could do this in a couple ways. In our entry I had the same issue, I just added a bead of caulk in between the molding and the backer board to smooth out the transition along the side to make it less noticeable. Alternatively you could trim the backing on that side so it stops just before your molding piece, and add the molding right on the wall. This would hide the backer board but that piece won’t stick out as far as the others so you could play around with it and see if that would bother you. Let me know what you end up doing!
Hello! For the horizontal boards, did you place them overlapping the flat board, or did you put them on top? I would think either way would leave an extra area to finish off.
Hi Kristen! I added the bottom cove molding, then put the flat backer board above that so it “sits” on the molding. The horizontal boards go above the flat board directly on the wall, not overlapping. Then the vertical battens are measured from cove molding to horizontal board and cut to fit. The flat backer board is so thin you can’t tell any difference between where the vertical battens touch the horizontal board. 🙂
The walls look amazing but I want to know where your bed frame is from!
Hi Emily! It is the Pottery Barn Addison bed, I don’t see it on the website any longer though. We had the headboard in a queen size in white and when we upgraded to a king bed I bought the same style, I loved it that much!
In relation to this question, have you found an issue where your mdf board does not line up exactly at the top? If yes, has that thrown off the idea of placing the horizontal board above the MDF? If yes, have you overcome this with anything specific or just caulk to fill any gap?
I’m not sure exactly what you mean but almost any small issues can be fixed with caulk. When I first started doing DIY projects around the house my cuts were nowhere near perfect, but caulk saved the day!
I love this! Did you have to use extenders on the electrical sockets? I know with bead board you often have to due to the thickness of the board so I’m curious if you had to get around that problem too.
Actually since the backer board is so thin I didn’t have to use any kind of extenders! I’ve done this on 4 different walls and the original electric sockets all fit just fine without any modification, which is great – 1 less step 🙂
We use cookies on our website to give you the most relevant experience by remembering your preferences and repeat visits. By clicking “Accept”, you consent to the use of all the cookies.
This website uses cookies to improve your experience while you navigate through the website. Out of these cookies, the cookies that are categorized as necessary are stored on your browser as they are essential for the working of basic functionalities of the website. We also use third-party cookies that help us analyze and understand how you use this website. These cookies will be stored in your browser only with your consent. You also have the option to opt-out of these cookies. But opting out of some of these cookies may have an effect on your browsing experience.
Necessary cookies are absolutely essential for the website to function properly. This category only includes cookies that ensures basic functionalities and security features of the website. These cookies do not store any personal information.
Functional cookies help to perform certain functionalities like sharing the content of the website on social media platforms, collect feedbacks, and other third-party features.
Performance cookies are used to understand and analyze the key performance indexes of the website which helps in delivering a better user experience for the visitors.
Analytical cookies are used to understand how visitors interact with the website. These cookies help provide information on metrics the number of visitors, bounce rate, traffic source, etc.
Advertisement cookies are used to provide visitors with relevant ads and marketing campaigns. These cookies track visitors across websites and collect information to provide customized ads.


So impressive, Erin! It looks great and does give so much warmth and character. What is your favorite white paint color for these projects?
I use Pure White or Extra White by Sherwin Williams in a semi gloss. Let me know if you try it Jamie, and if you ever want my help! 🙂
Wow this looks GREAT!! Been wanting to do this. Does it look off with the rest of the walls being textured?
Thanks Kristin! No actually it makes the wall look more finished and distinct from the surrounding walls in my opinion. 🙂
Erin,
I came across your article as I have texture walls and am looking to do something like this. I’m new at this and don’t have a stud muffin to help me with “manly” things. I hope you would. I’m still deciding about what to do with my 2 years room. Any ideas? And can I bug you in future with questions? If yes, how? Thank you!
I totally have faith that you can do this on your own! With just basic tools, updating your walls should not be hard. Let me know if you have questions along the way!
Erin,
Thank you for all the valuable information. The wall I will be installing board and batten on has an outside corner and I won’t be taking it around the corner. Any tips on how I can finish it off so that the backer board won’t be seen?
Thank you!
Hi Caileen! You could do this in a couple ways. In our entry I had the same issue, I just added a bead of caulk in between the molding and the backer board to smooth out the transition along the side to make it less noticeable. Alternatively you could trim the backing on that side so it stops just before your molding piece, and add the molding right on the wall. This would hide the backer board but that piece won’t stick out as far as the others so you could play around with it and see if that would bother you. Let me know what you end up doing!
Looks great. What are the 2 paint colors used in the after photo for your bedroom (prior to the redo)?
The wall color is Repose Grey and the paneling is Dovetail, both by Sherwin Williams. 🙂
Hello! For the horizontal boards, did you place them overlapping the flat board, or did you put them on top? I would think either way would leave an extra area to finish off.
Hi Kristen! I added the bottom cove molding, then put the flat backer board above that so it “sits” on the molding. The horizontal boards go above the flat board directly on the wall, not overlapping. Then the vertical battens are measured from cove molding to horizontal board and cut to fit. The flat backer board is so thin you can’t tell any difference between where the vertical battens touch the horizontal board. 🙂
The walls look amazing but I want to know where your bed frame is from!
Hi Emily! It is the Pottery Barn Addison bed, I don’t see it on the website any longer though. We had the headboard in a queen size in white and when we upgraded to a king bed I bought the same style, I loved it that much!
In relation to this question, have you found an issue where your mdf board does not line up exactly at the top? If yes, has that thrown off the idea of placing the horizontal board above the MDF? If yes, have you overcome this with anything specific or just caulk to fill any gap?
I’m not sure exactly what you mean but almost any small issues can be fixed with caulk. When I first started doing DIY projects around the house my cuts were nowhere near perfect, but caulk saved the day!
I love this! Did you have to use extenders on the electrical sockets? I know with bead board you often have to due to the thickness of the board so I’m curious if you had to get around that problem too.
Actually since the backer board is so thin I didn’t have to use any kind of extenders! I’ve done this on 4 different walls and the original electric sockets all fit just fine without any modification, which is great – 1 less step 🙂