Simple DIY Plans to Build this Outdoor Sofa and Chair!
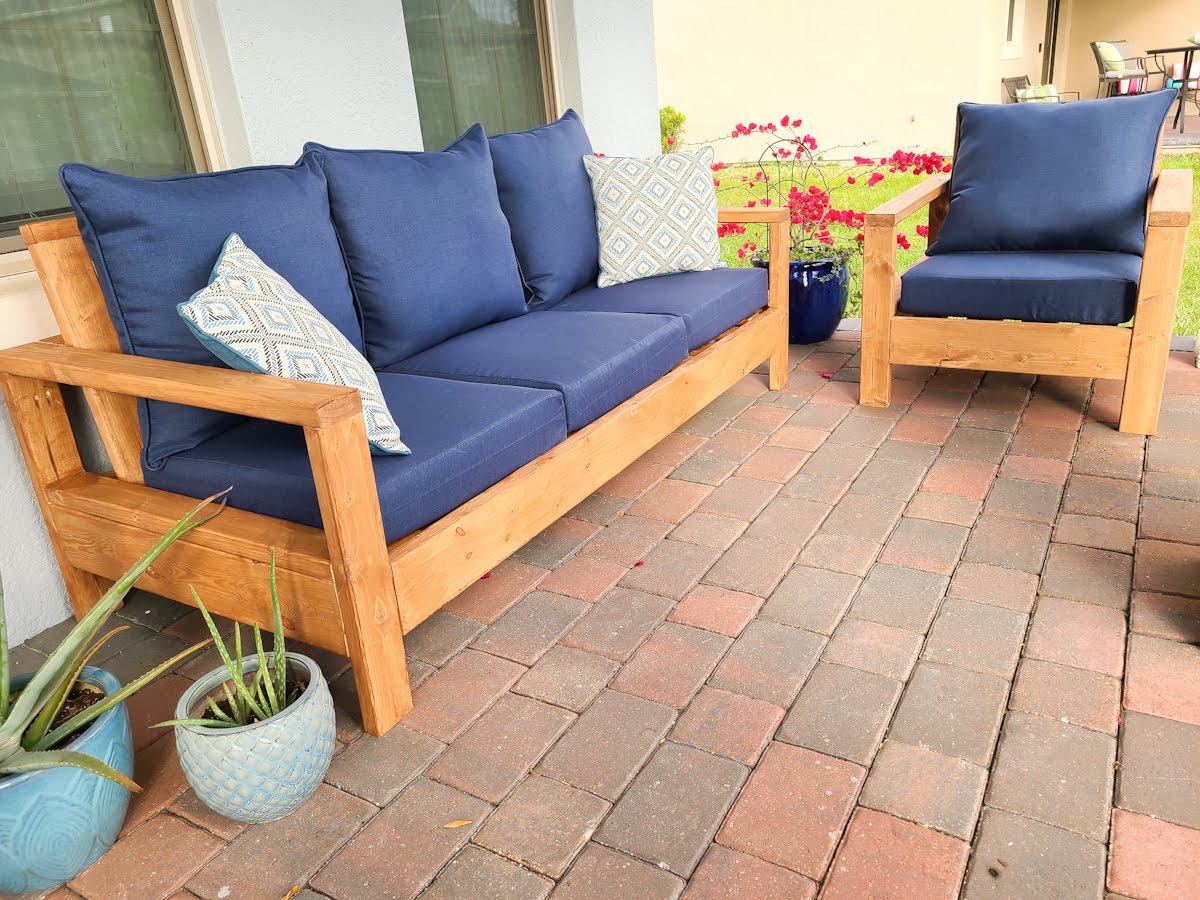
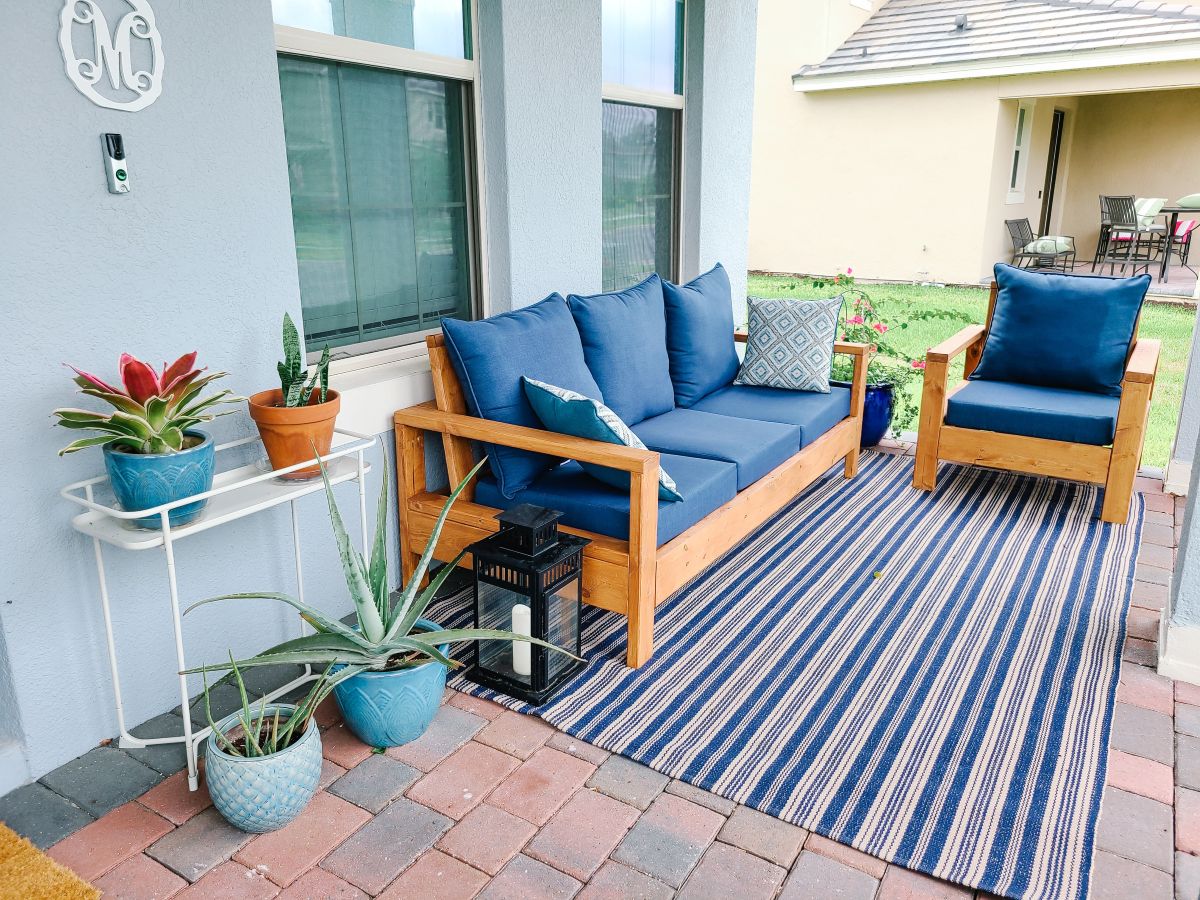
OK, I think this build may be my biggest project yet! It is definitely the heaviest. With the strong winds we can get here in Florida we needed substantial outdoor furniture. I can not take credit for the plans, they are from one of my favorite sites by Ana White. She is my go-to wordworking guru! I began working with wood by following her easy to read (and free!) plans, and any time I think of a new project I check to see if she has already tackled something similar that I can base my project on.
The link for this particular build is here for the sofa. I did make some modifications along the way that I will detail. All in all, this took 2 full days. I built the sofa first, stained it the next day and then decided (due to trying to get stain in all the nooks and crannies) to stain the chair pieces first before putting it together.
Outdoor Sofa DIY
Ana’s plans for the sofa fit 3 25″x25″ cushions. I found these outdoor cushions I wanted to use but they were 24″x24″, so I knew I would have to modify things slightly. The first part of her directions state what to do if you use different sized cushions, which was so helpful! For 24″ cushions it says to reduce the measurements between the arm rests by 3 inches, easy peasy!
*If you want to keep all the original plans the same, here is a link to 25″ outdoor cushions.
The first step is to make a list and get the lumber. I combined both the lumber plans for the sofa and the matching char in order to make one trip to the store. Here’s my first change: her shopping list calls for (4) 2″x6″x8′ boards, I was able to use 4 total for both builds, and I added an extra 2″x4″. Lumber is not super cheap right now so using a 2″x4″ stud saved a ton of money, and it is in an area where you can’t even see it!
This post contains affiliate links. This means I may earn a commission should you choose to make a purchase using my link to Amazon.com. I only recommend items that I personally love!
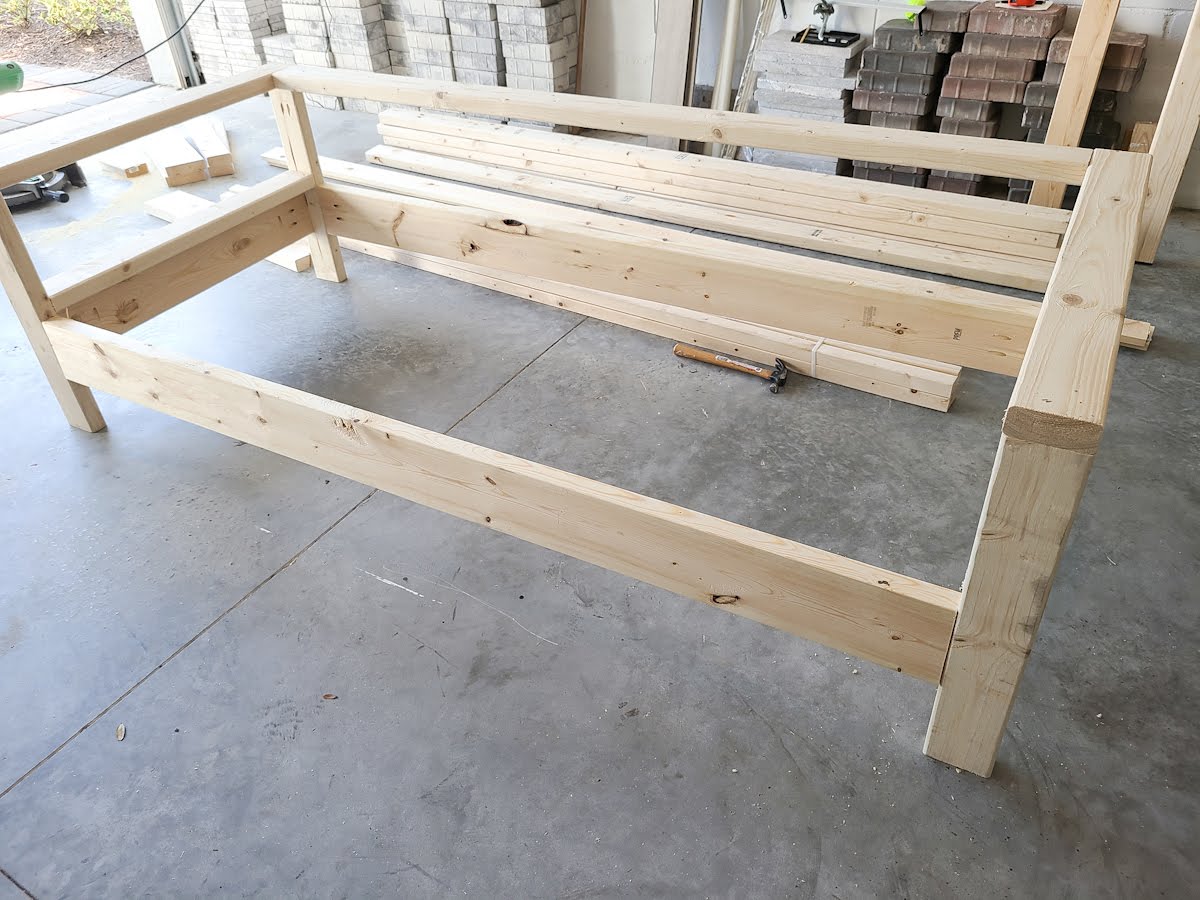
Step 1: Build the arms
These plans are made using a Kreg Jig to make pocket holes. Pocket hole joints are super strong and the Kreg Jig makes drilling the perfect holes so simple. I could drill each hole quickly and I didn’t have to clamp or have someone else help me, even with the long 2″x6″ boards. Trust me, you need one if you are doing any kind of wood work!
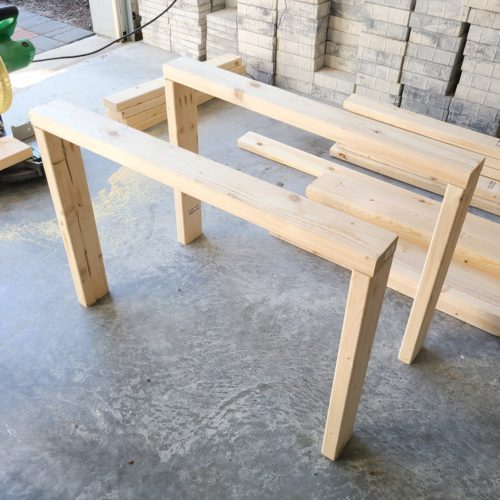
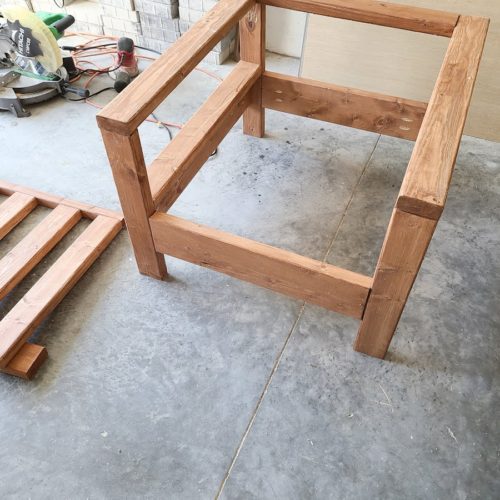
The arms are made of 2″x4″ and 2″x6″ boards. They are sturdy all on their own and begin to show how substantial this couch will be! I used 2 1/2 exterior pocket hole screws since this is an outdoor couch. I feel like it is worth the extra few dollars so the screws won’t rust.
Step 2: Add the front and back braces
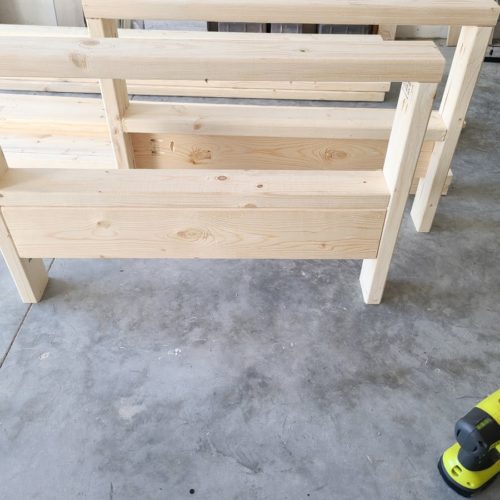
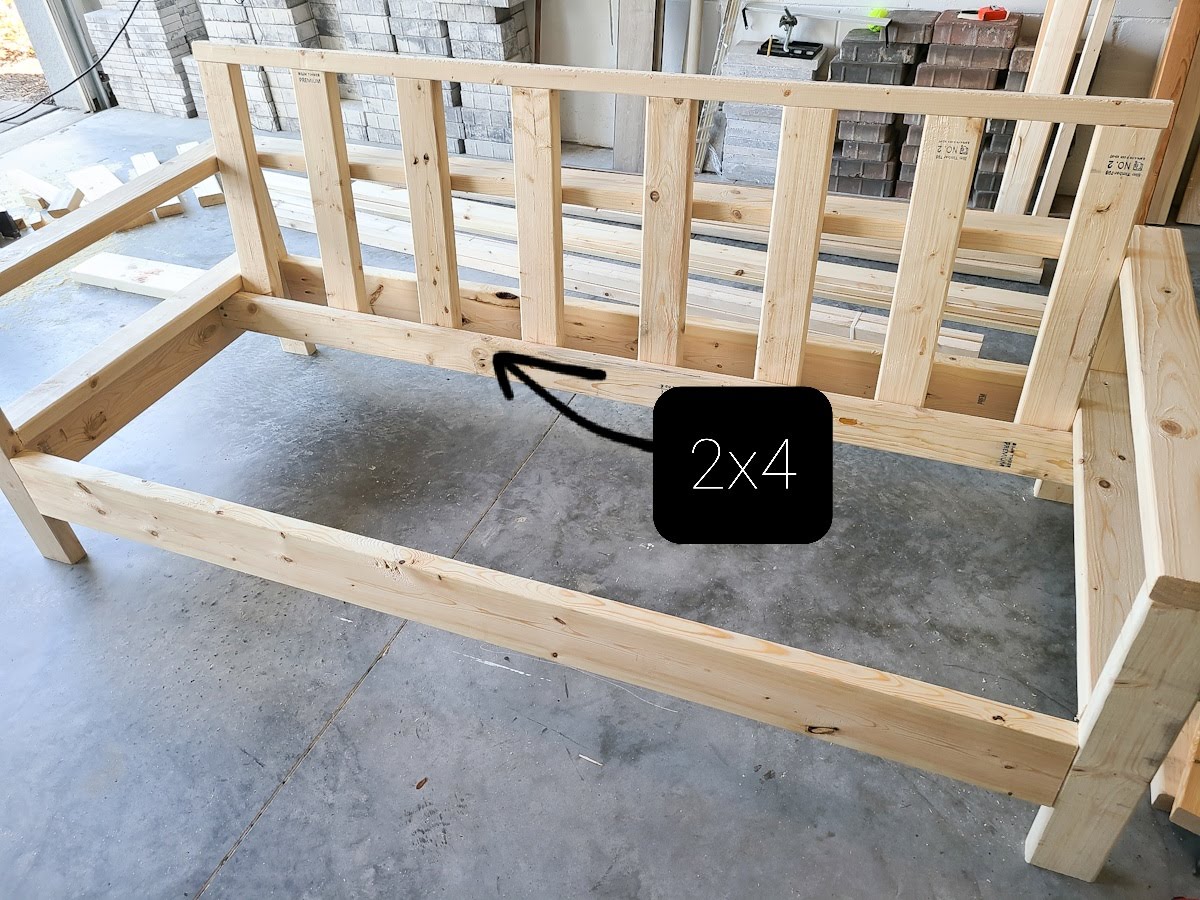
Using the pocket hole jig makes adding the 2″x6″ front and back bases easy. Just line them up with the existing 2″x6″ boards on the legs and attach. A 2″x4″ is added as the top of the back rest.
*Remember, if you are not using 25″ cushions, these long pieces will need to be modified from the original plans. The depth does not change. So the modifications would be:
(2) – 2×6 @ 72-1/2″ – bases
(1) – 2×4 @ 72-1/2″ – back
(1) – 2×2 @ 72-1/2″ – back rest top
(8) – 2×4 @ 23-3/4″ – back slats
(1)- 2×4 @ 76-1/2″ – back rest base
(2) – 2×2 @ 76-1/2″ – seat slat cleats
Step 3: Add the back slats
The plans call for 9 slats but since I was shortening the piece lengthwise by 3 inches, I only made 8 slats for the back and it worked fine. This is also where I substituted a 2″x4″ instead of a 6 inch board at the base of the back rest, since it is a third of the cost!
Once the back is put together you will install the front of it 8 inches away from the back of the couch, at an angle. This part made me pause while I figured it out. I knew I didn’t want to screw through the beautiful 6″ side braces because you would see the screws from the side. So I installed the bottom with screws at an angle (called toe-screwing, here’s a quick how-to) and this back board is super secure.
Step 4: Build the seat
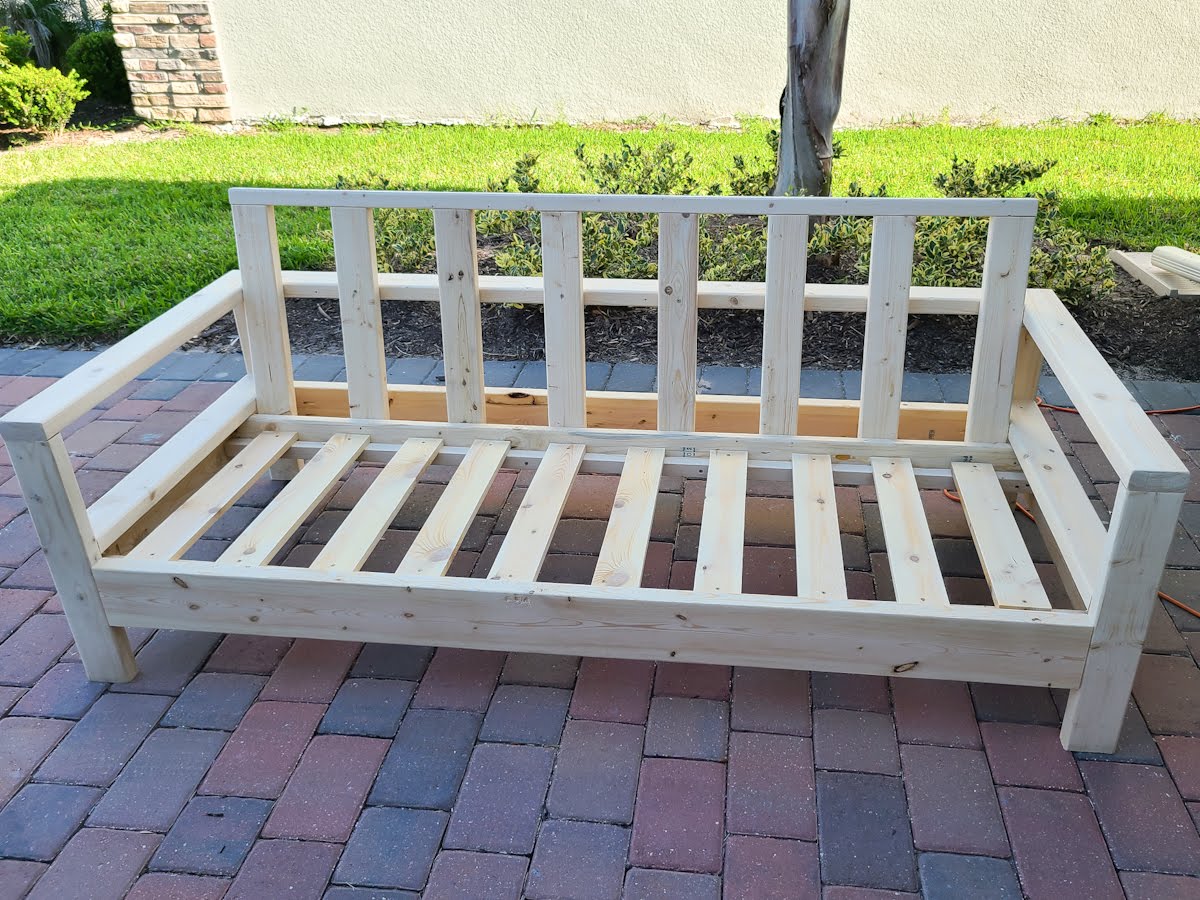
The last step is definitely the easiest. Attach the back 2″x2″ flush with the bottom of the 2″x4″ back rest. Attach the front 2″x2″ one inch below the front brace so the seat is slightly reclined. The seat slats are screwed right into the 2″x2″ boards.
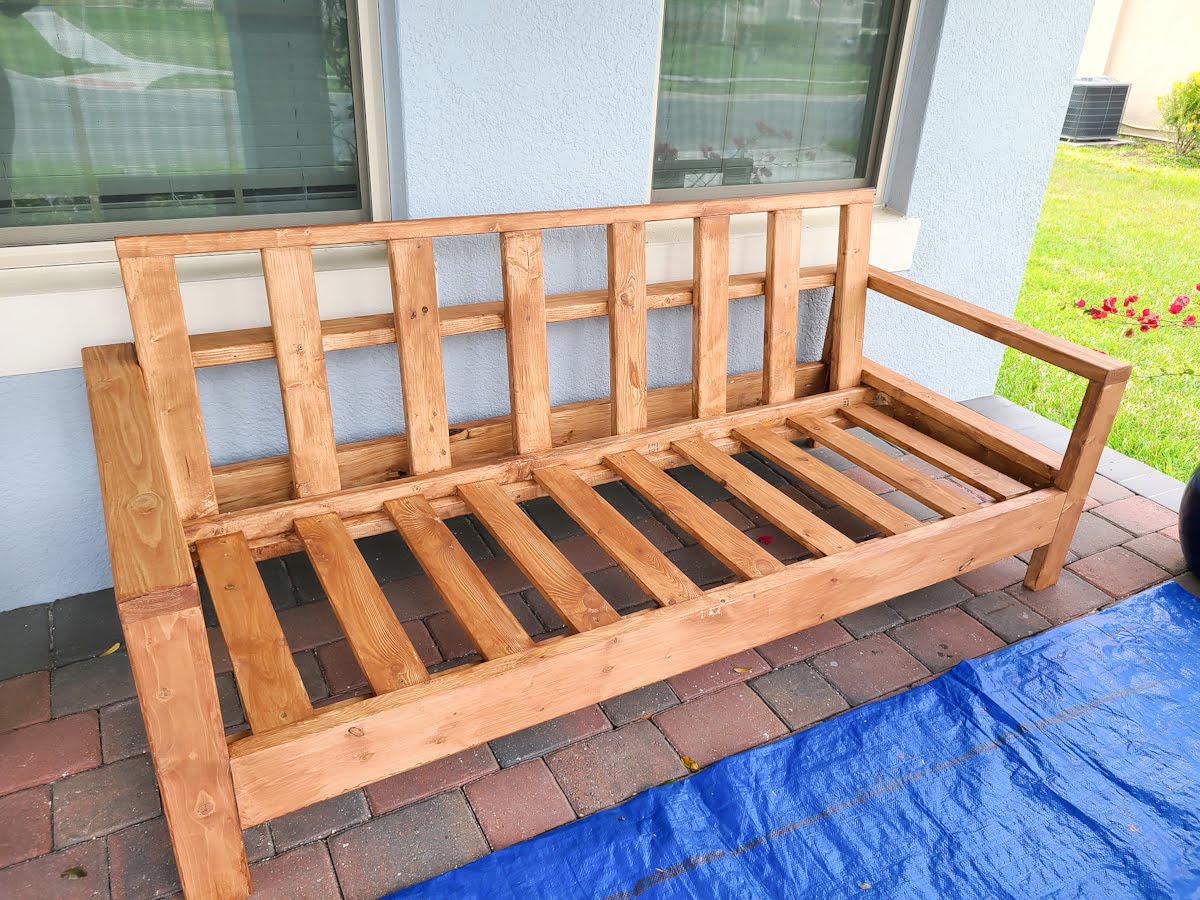
After a good sanding, it is now time for stain! I used Thompson’s Water Seal transparent waterproofing stain because it prevents water and UV damage. A bonus is the one coat application! Like I said before, getting in between and behind all the slats took a lot of time. So when I built the matching chair, I stained everything first.
Outdoor Chair DIY
Ana’s plans for the matching chair can be found here. I made the same modifications as with the couch, subbing one of the 2″x6″ boards for a 2″x4″. Also, I shortened my width measurements by 1″ on the front and back since my cushions are 24″. So the modified cuts would be:
(2) – 2×6 @ 24-1/2″ – bases
(1) – 2×4 @ 24-1/2″ – back
(1) – 2×2 @ 24-1/2″ – back rest top
(1) – 2×4 @ 28-1/2″ – back base
(2) – 2×2 @ 28-1/2″ – seat slat cleats
Tip: Measure, cut, sand and stain your boards all at once to save time. The Thompson’s stain dries super fast, I stained the boards in the morning and was able to put the chair together later that afternoon. Use the Kreg Jig to make the pocket holes.
Step 1: Build the arms
Following the same steps as the sofa, build both of the chair arms using Ana’s instructions.
Step 2: Add the front and back braces, and build the back rest
Add the 2″x6″ braces to the front and back of the chair, connecting the two arm rests. *Remember if you are using 24″ inch cushions, make the above cut modifications.*
For the bottom of the back rest, here is where I subbed out the 6″ board for the 2″x4″. Then install the back at an angle again using the same toe-screwing technique from the inside of the frame, 8 inches from the back brace.
Step 3: Add the seat slats
Add the 2″x2″s for the seats and then the seat slats. If using smaller cushions, modify the seat slat cleats accordingly.
After building the big sofa, this chair comes together with ease!
Great job!
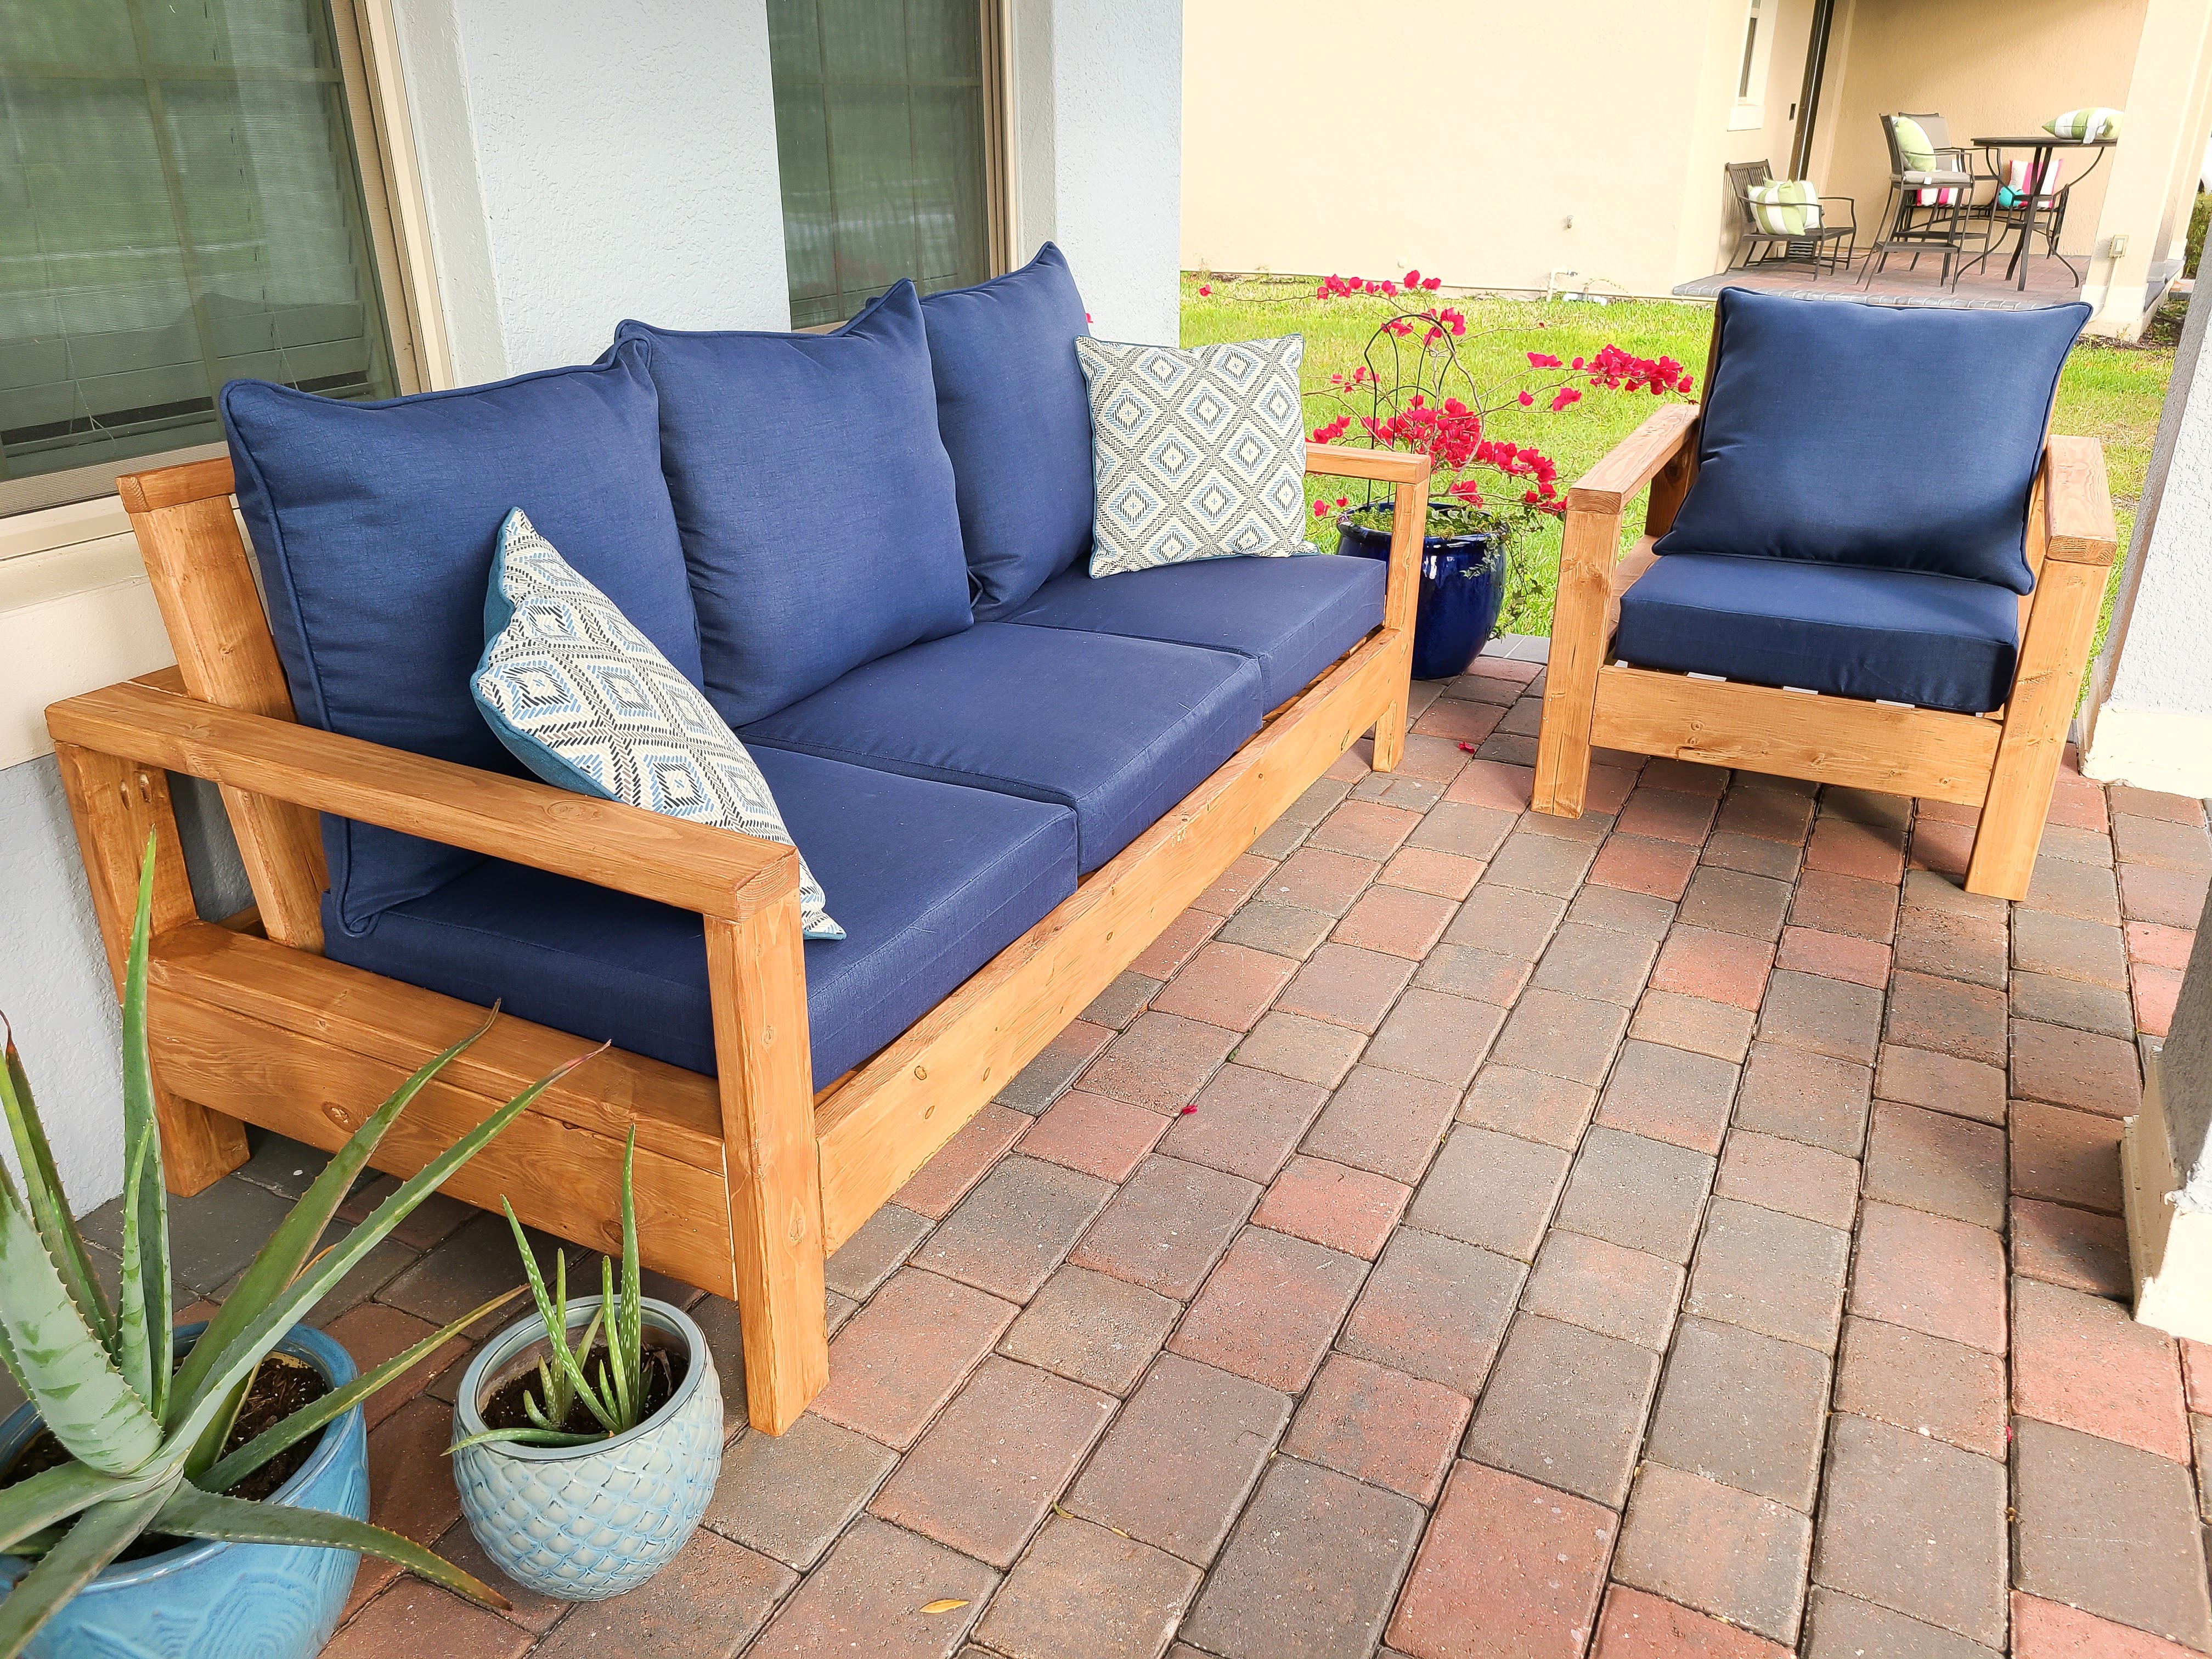
And that’s it! Thanks to the one coat stain and sealer, you are ready to throw cushions on and relax. I’m so excited this is ready for spring, this is the time of year when Florida really starts to shine. It’s time for a glass of wine and to relax on your new, gorgeous outdoor sofa, you earned it!
If you liked this project, follow along below and be sure to check out some of our other DIY ideas such as this easy faux shiplap wall!
9 thoughts on “Modern Outdoor Sofa and Chair Build”
This chairs look so beautiful- I love the wood look! This is the best time to do stuff like this around the house, during a pandemic when you are home most of the time!
Updated the cuts for both the sofa and the chair! I followed Ana’s shopping list unless I mentioned otherwise, like subbing one of the 2×6 used for the bottom of the back rest for a more inexpensive 2×4. 🙂
We use cookies on our website to give you the most relevant experience by remembering your preferences and repeat visits. By clicking “Accept”, you consent to the use of all the cookies.
This website uses cookies to improve your experience while you navigate through the website. Out of these cookies, the cookies that are categorized as necessary are stored on your browser as they are essential for the working of basic functionalities of the website. We also use third-party cookies that help us analyze and understand how you use this website. These cookies will be stored in your browser only with your consent. You also have the option to opt-out of these cookies. But opting out of some of these cookies may have an effect on your browsing experience.
Necessary cookies are absolutely essential for the website to function properly. This category only includes cookies that ensures basic functionalities and security features of the website. These cookies do not store any personal information.
Functional cookies help to perform certain functionalities like sharing the content of the website on social media platforms, collect feedbacks, and other third-party features.
Performance cookies are used to understand and analyze the key performance indexes of the website which helps in delivering a better user experience for the visitors.
Analytical cookies are used to understand how visitors interact with the website. These cookies help provide information on metrics the number of visitors, bounce rate, traffic source, etc.
Advertisement cookies are used to provide visitors with relevant ads and marketing campaigns. These cookies track visitors across websites and collect information to provide customized ads.










This chairs look so beautiful- I love the wood look! This is the best time to do stuff like this around the house, during a pandemic when you are home most of the time!
Wow- looks great! I’’d love to try a project like this one day!
I love this whole set up! And it doesn’t look hard. (It’s usually much easier than we initially anticipate, huh?)
How do I get the plans for the sofa and chair?
I have linked each of them in the post, but here are the direct links:
Sofa http://www.ana-white.com/woodworking-projects/outdoor-sofa-modern-comfort-collection
Chair http://www.ana-white.com/woodworking-projects/outdoor-chair-modern-comfort-collection
I hope this helps!
Do you have your cut list? For the 24×24 cushions
Hi Meg! Updated the cuts for the 24″ cushions on the sofa and the chair. Everything else follows Ana’s cut list. 🙂
Can you post your shopping list and cut list for the 24×24 cushions?
Updated the cuts for both the sofa and the chair! I followed Ana’s shopping list unless I mentioned otherwise, like subbing one of the 2×6 used for the bottom of the back rest for a more inexpensive 2×4. 🙂